Saturday, May 28, 2011

DIY: Acrylic Nails At Home - Gold Glitter


 This is to show that you've got to check the nail from all sides to make sure it's even.  I think I did pretty good!  :-P

Please consult the post HERE for the general "how-to" to achieve this at home!

Instead of painting the clear acrylic all over the nail, I put the gold glitter acrylic powder (haul post here) on the white tip and THEN coated everything with the clear powder to seal it in. 

The next day, I decided to glue on (with regular nail glue) some rhinestones.  :)

Hope you enjoyed!

Friday, May 27, 2011

Inspiration: Dead (This was for a contest!)

 Happy Friday everyone!  :)  Usually I post my DTB entries on my blog the same day I post them on the MakeupTalk website, but life has been busy!  So here it is anyway!

How creepy!  lol!  Anywhoo!  This was for a makeup contest on Makeuptalk.com.  I'm not just "into" zombies and death and such.

It was really fun to do anyway, so here's some pics for yall!

Main Products Used:
  • NYX e/s in White (under eyes, highlight face, and eyes)
  • MAC e/s in Print (used on/under eyes and as a contour)
  • MAC pigment in Dark Soul (used for eye shadow)
  • Ardell Lashes in Gisele
On the lips I have Rimmel l/l in East End Snob (just around mouth).  I also have concealer on them and Victoria's Secret Beauty Rush l/g in Sugar High.

The fake blood is just honey and red food coloring.  Yes, it was gross to have a huge mouthful of honey... lol.


^^Not my best pic... lol

Tuesday, May 24, 2011

Twitter, anyone?


So, I don't know how to use twitter, but I think I might learn!

Follow me, please! Help motivate me!

ox0xbarbiex0xo

Haul: The Balm - Balmbini Palette


I won this gorgeous palette from Funny Face Beauty's celebrity makeup contest!  I entered my Lady Gaga makeup and won 3rd place!  :)  I received this in the mail many moons ago and have gotten the chance to use it a few times.  The blushes are amazing and the taupe is my favorite of the shadows!


Thanks Alicia!  :)  I love it!

Monday, May 23, 2011

Inspiration: Blue, Purple and Orange

Unless you can come up for a better name for this look, "Blue, Purple and Orange" it is!  lol

Sometimes my creativity is really lacking.  What I did was write "Lid - _____, Corner - ______, Crease x1 - _____, and Crease x2 - ______" on a piece of paper.

I reached into my drawer of BFTE minerals and grabbed one out.  The first one on my paper was lid, so the first color I pulled out went on my lid, and so on.

I have 2 crease colors for variety, plus, I didn't know what colors I'd get and I thought I'd be able to make a better look with two.  I think it worked out!


Main Products Used:
  • BFTE minerals:
    Lid - Peacock (blue)
    Corner - Whisper (white with blue shimmer)
    Crease x1 - Grape (purple)
    Crease x2 - Crush (orange)
In my haste, I forgot to write down what liner I used, but I'm pretty sure it's L'Oreal HIP cream liner in Black.

Anyway, this is probably not a color combo I would have thought up on my own.  :)

Hope you enjoyed!

Friday, May 20, 2011

FOTD: March 13, 2011

I know... a long time ago!  Life got busy!  Lol!

Here it is anyway!  Does the date really matter?  I only label them with the date because I write the products on note cards and then I can refer to the right cards... blah, blah, blah... long story!


(I am not happy with this lip swatch... lol)

Main Products Used:
  • MAC e/s in Dark Devotion
  • NYX e/s in Wild Flower
  • Bobbi Brown e/s in Mahogany
  • Estee Lauder e/s duo in Ginger
  • MUFE e/l in 0L
On the cheeks, I have L'Oreal True Match blush in Rosy Outlook.

On the lips I have OCC lip tar in Memento and MAC l/s in Angel.

 Me and the boyfriend going on a date!  We went to Golden Corral (I think) and Baskin Robbins!  lol

Thursday, May 19, 2011

NOTD: China Glaze - Tree Hugger


China Glaze - Tree Hugger

I don't have a color like this in my collection, so I figured - WHY NOT!?  Lol!  It's so pretty for spring!  And I thought the polka dots (done with Nailene white) were a welcome addition!

Saturday, May 7, 2011

DIY: Acrylic Nails At Home - French Tips


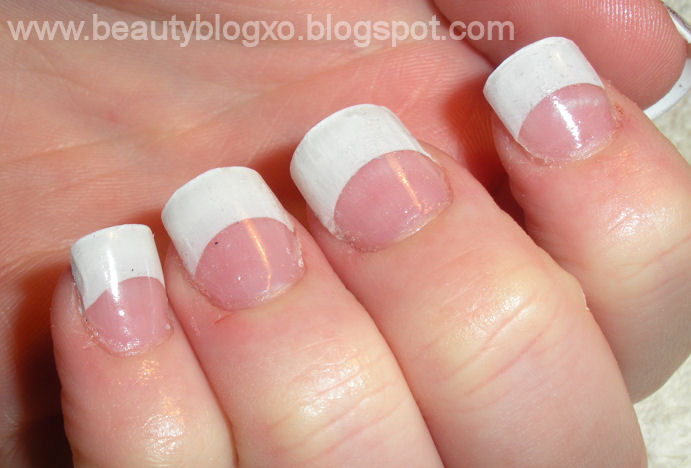
These are some acrylic nails I did on my sister

I recently had a haul post talking about the products you will need to achieve this at home.  You'll probably need to refer to that post because I'm sure I'll be a slappy when talking about the exact names of the products.  It's been a long day!

Here's a break down of the steps:


**Prep your nails**
  1. Start with clean hands!  Remove any polish (etc) and then wash your hands.  
  2. After pushing cuticles and trimming the natural nails (I like to trim them SUPER short because I hate when you can see the natural nail behind the acrylic tip), rough up the surface of the nail with a nail file or the course side of a 4-sided buffing block. The better you rough up the nail, the better the adhesion of the acrylic.
  3. Apply the dehydrator.  I'm sure you should be really careful to get this ONLY on the nail.  You don't want to dry out your cuticles.
  4. I used a primer as well as a precaution.  I researched so many different ways to do this, and I just figured I'd do both.  It's a quick step and it's a pretty cheap product too. 
Now that your nails are prepped, apply the tips!

  1. Particularly when you're doing this on yourself, you'll want to have all the tips pre-measured out for each finger before you start gluing.  It's harder to work when you've got HUGE nails on!  Lol!  It may also be easier for you to apply the tips to the dominant hand first.  
  2. Clip the nails down to the size you want.  There's special clippers you can get for this, but they're expensive!  Like $20-$30!  I just carefully did it with regular clippers.
I bought the clear acrylic powder (and white tips), so I could apply it on the entire nail.  No need for doing the tip with white and doing the bottom with pink.   That's a more complicated step, more time consuming, more room for error... etc.  You get the idea!

**Applying the acrylic**
  1. Dip your brush in the acrylic monomer/bonder (with paper towel ready!) and dab it off on the side of your container.  I don't recommend doing this is the SAME container that the product is in. Just pour a little bit into a small glass (I used a small votive candle holder). 
  2. Dip the brush into the acrylic powder to get a pearl of product.  If it doesn't pearl, it's too wet or dry.  By the tenth nail, you'll be an expert... lol!  Don't worry!
  3. Apply a thinner coat by the cuticle and gradually get thicker toward the tip of the nail.  ALSO!  Careful not to get this on your skin.  If any of the acrylic gets on your skin and sets, it will make the nails lift very fast!  You'll only get a day or two of wear - and if you're anything like me, you'll pick at it!
**File the nails**

  1. Use your heavy duty file to square the nails off and even out the top of the nail bed.  Depending on how well you applied the acrylic, you may have really thin spots or thick spots.  It's important to look down your finger to make sure it's even.  
  2. I used a drill to finish off this step.  The drill is available at Sally Beauty Supply, but it's not cheap!
 This drill is made for doing acrylic nails, so it has bits specifically for it.

I used this one ^^^ to file down the nail bed. 

Side note: Peep these gold nails I did on myself!  :-P

This bit ^^^ is for filling nails, just as an fyi.


**Make the nails shine**
  1. I used my 4-sided buffing block and some clear top coat on her nails for the glossy top.  
I didn't know at the time, but Sally does sell a buffing board and buffing cream for this.  Don't worry, I'll buy it!  :-)  I can't speak to how well it works (obviously because I don't own it), but it might be something you want to consider if you're doing this!

Finished product:

Friday, May 6, 2011

Inspiration: Naked Palette - Day to Night - Look #2

Above: My Day Look.  My closed eye shots did not turn out.  Also, this one FAINTLY shows the colors of the purple. I don't know why my camera does this sometime.  If you have the palette, you'll know what these colors look like in real life.

Main Products Used:
Day:

  • Urban Decay - Naked Palette:
    - Toasted (lid)
    - Hustle (outer V)
    - Naked (brow bone)
    - Buck (to fill in brows)
  • Urban Decay e/l in Zero (tightlined)
Night, add ON TOP of this look:
  • Urban Decay - Naked Palette:
    - Creep (large outer V - from the outer V tapering down to the inner corner - and under eye)
    - Hustle (mid section - vertically speaking - of lid)
    - Toasted (inner corner)
  • Urban Decay e/l in Zero (tightlined and lashline)


To make up for my lack of "Day Look" pictures, here's a few of the night look.  The purple is more obvious in these pictures but still not up to real-life standards.  The last picture of the closed eye shows the "large outer V tapering in" stuff I was trying to explain.  :)

This is a pretty quick switch.  But a little more complicated than my Look #1 post.

Hope you like this!

Sunday, May 1, 2011

Inspiration: Naked Palette - Day to Night - Look #1

 Above: The "Day" Look
Main Products Used:
Day:

  • Urban Decay - Naked Palette:
    - Sidecar (lid)
    - Buck (crease and under eye)
    - Virgin (brow bone and inner corner)
    - Darkhorse (top lash line)
    - Buck (to fill in brows)
  • Urban Decay e/l in Whiskey (tightlined)
Night, add ON TOP of this look:
  • Urban Decay - Naked Palette:
    - Darkhorse (all over lid)
    - Virgin (brow bone)
    - Creep (over liner)
  • Urban Decay e/l in Zero (tightlined and lashline)

My idea of "day makeup" and "evening makeup" is probably a little different than a lot of people.  I don't mind wearing a dark smokey eye in the afternoon, so this was my attempt to make soft looks.  :)  I have a more dramatic look coming!

My "Night Look" didn't photograph well.  But you can see that it's slightly darker and a little more dramatic.  It's a super quick switch from a clean and fresh look to a more smokey evening eye.  The whole switch probably took me about 30 seconds.  It'd be perfect for coming home from work, throwing on a dress, smoking up the eyes and going for dinner.  :)

Hope you guys enjoyed!
Related Posts Plugin for WordPress, Blogger...